Welcome to issue #27 of Susanality, a free weekly newsletter. Thanks for being here! If you’re loving this newsletter, please consider a paid subscription. Having your support would mean a lot to me, as I continue to work hard to bring you fresh content on a weekly basis with additional posts and recipes going out to paid subscribers at least twice a month. Thanks again!
In case you missed it when I quietly announced it on Instagram, I am working on a new book! I thought you might be interested in hearing more about how a cookbook is made, as I make it. It’s been a challenge to keep this newsletter on track while I stay on schedule with my manuscript, which is due on June 1. Today I am dovetailing the two projects, to let you in on the book process a bit more.
This is the book I’ve always wanted to write, and I’m finally getting to do it! I’m really excited about this project, because it is all about hyper-seasonal vegetable-forward cooking — what I most love to do.
I am photographing this book myself — in real time. This is not at all the norm for a cookbook. Generally, an author has about a year (these days sometimes much less than that) to produce a manuscript complete with photography. Most often, the author completes the recipe development, then a team consisting of a photographer, a prop stylist, and a food stylist (which sometimes might be the author) is put together for the shoot. You shoot the whole book in ten days straight, usually at least ten to twelve shots per day. This means you need to find a whole year’s worth of produce (if that’s an aspect of the book) in those ten days — which could be in the dead of winter! There are exceptions to this rule, of course. But that’s usually how it goes. It is how I did my first two books, styling them myself.
I really wanted this book to be shot season by season. It would be all about celebrating the glory of each vegetable as it‘s having its time in the sun. Everything would be at its peak when developing the recipes and when they’re photographed. After almost two years of staying home more than ever, there was something appealing about continuing in that do-it-myself-at-home vein. I wanted this book to feel like a very personal project. I wanted to do every aspect myself. It’s a much more organic process, and I have to say, I’m really enjoying it!
I’m constantly inspired by what Mother Nature has on offer, and right now, that’s A LOT.
Summertime — this fast-moving season— has filled me with panic, because I know that I have to capture the moment before everything turns into a pumpkin!
I think we can all agree that there is nothing that compares to a ripe summer tomato. One of the challenges has been racing to keep up with the produce, especially tomatoes! I’ve had a fun couple of weeks buying many heirlooms from my very favorite farmer, Marilee Foster in Sagaponack. Marilee’s little stand on the side of the road has been my go-to for many years. It’s laden with the most perfect specimens of a wide and wild variety of tomatoes carefully arranged on platters with the best hand-drawn signs.
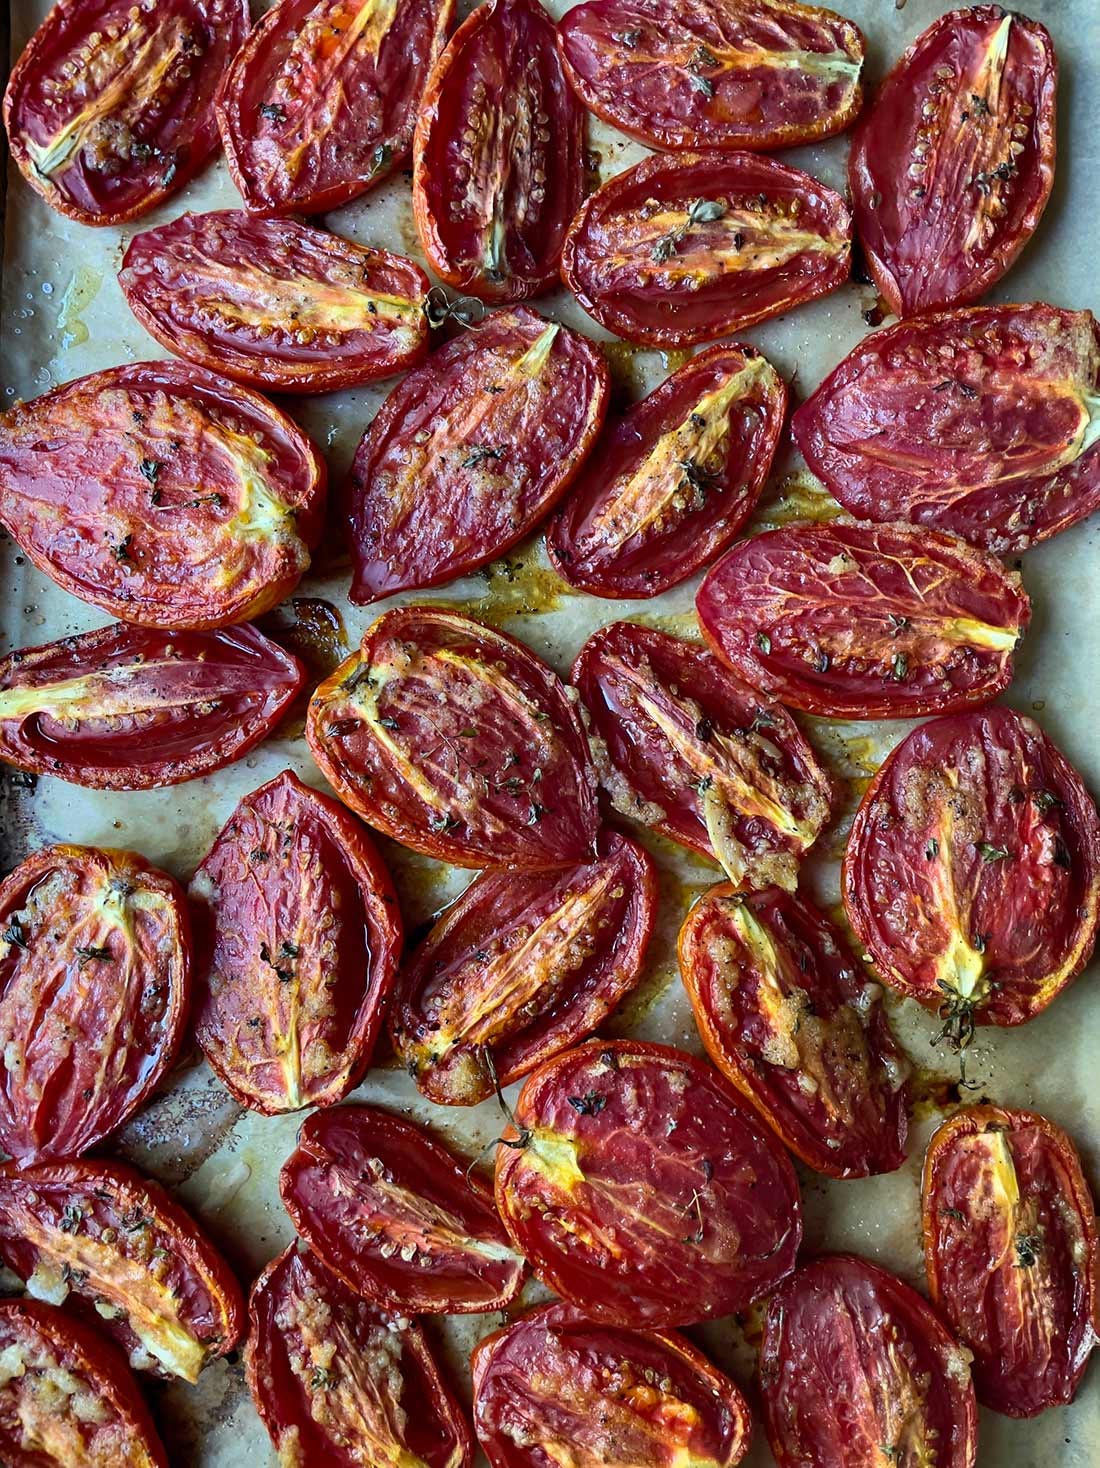
So that I can preserve this tomato moment for months to come, one of the things I have been making a lot of is Slow-Roasted Tomatoes. This recipe works especially well with plum tomatoes. Once they are roasted, I freeze them to enjoy later. (I’m not really a canner, even though I’ve done it, and I may still.)
Roasted tomatoes are versatile and can be used in so many ways in different recipes. The flavor is “baked in” so you can just add a few to a pasta dish, make a soup out of them, add to shakshuka or frittata, or use them to top toast, to brighten up a cold January day (I plan to do this). Try them in a PLT sandwich. Think of them as “instant tomato sauce.” Since much of the moisture has been cooked out, the tomatoes have been coaxed into jammy perfection. You can just toss them in a pan and let them break down. They’ll be ready to mix with pasta in minutes, no long simmering required.
Farm stands and farmer’s markets are flush with plum tomatoes right now, and the price is right. Around here, most stands have 4-quart boxes of “sauce” tomatoes which are perfect for this recipe. Since the sizes can vary so much, I am going to give you directions for a sheet-pan full of tomatoes — which should be about 2 quarts. If you do buy a 4-quart box, just double the recipe using two sheet pans, and know that the cooking time will be slightly longer. This method requires you to use your instincts and judgment, rather than a hard and fast recipe.
PS - I wanted to remind you that all of the recipes in my newsletters live permanently here. You can also scroll through public recipes on my site or keep up with me on Instagram. Or better yet, you can support me by ordering my book, Open Kitchen.
Slow-Roasted Tomatoes
Click here for a printable recipe
Makes 2 to 3 dozen halves
These quantities are perfect for one sheet pan full of tomatoes. For me, that was 28 halves, but these were on the large side. If the skins of the tomatoes are thin, you can eat them, especially if you’re adding them to toast or pizza, but you can easily slip them off after they're cooked, too. Your choice!
3 large garlic cloves, grated on a microplane
3 tablespoons olive oil
28-32 plum tomatoes, halved lengthwise
1 teaspoon kosher salt
Freshly ground pepper
1 tablespoon fresh thyme leaves
For a spicy variation:
1 tablespoon Aleppo-style pepper
Heat oven to 300°F. Line a sheet pan with parchment paper. Combine the garlic with the oil and set aside.
Arrange the tomatoes close together, with the cut sides up. If any are very large, quarter them. Season with the salt (use a little more if needed to sprinkle everything evenly) and an even sprinkling of pepper. Brush them with the garlic oil, taking care to distribute the garlic evenly with the brush. Sprinkle the thyme leaves over top.
Place on the center rack of the oven and bake until the tomatoes are shriveled but still a bit juicy, and the juices on the parchment start to darken. This can take anywhere from 1½ hours for small tomatoes to 2½ hours for larger tomatoes but use your judgment. If you want to make a spicy version, add the Aleppo-style pepper after the first hour. If you double the amount and do two sheet pans, it will take a little longer.
Let the tomatoes cool on the sheet pan. The juices will thicken, and they’ll be easier to handle when they’re cool.
Once they’ve cooled, layer them in a flat container with wax paper or parchment between the layers. Chill in the refrigerator, and once cold, freeze for later use.
Note: It’s better to chill the tomatoes before putting them in the freezer to reduce the number of ice crystals that form in the container. When ready to use, defrost as many as you need on a plate at room temperature. They will exude some extra liquid which you can blot with a paper towel or cook off.


Love reading this post. I just came back from my sister’s place at the Jersey shore and am already missing the tomatoes from there. Usually I make the moon blush recipe from Nigella but this looks great for the larger ones and I’m so excited to try your expert advice for freezing. Thanks!!
We make these too, with cherry tomatoes sometimes, and I just thought I'd share a combination that's really good, since I think you said in one of your blog posts that you have a lot of tarragon. We cook the tomatoes as you do, adding basil and sprigs of parsley, but also - the key! - tarragon and lemon thyme. There's something about the tarragon/lemon thyme combination that ends up being heavenly with the roasted tomatoes. Thanks so much for your newsletter; it's wonderful.